

New to Tana Outliner or haven't signed up yet? Here's an intro to how Tana Outliner is different from Notion.
What you can import from notion
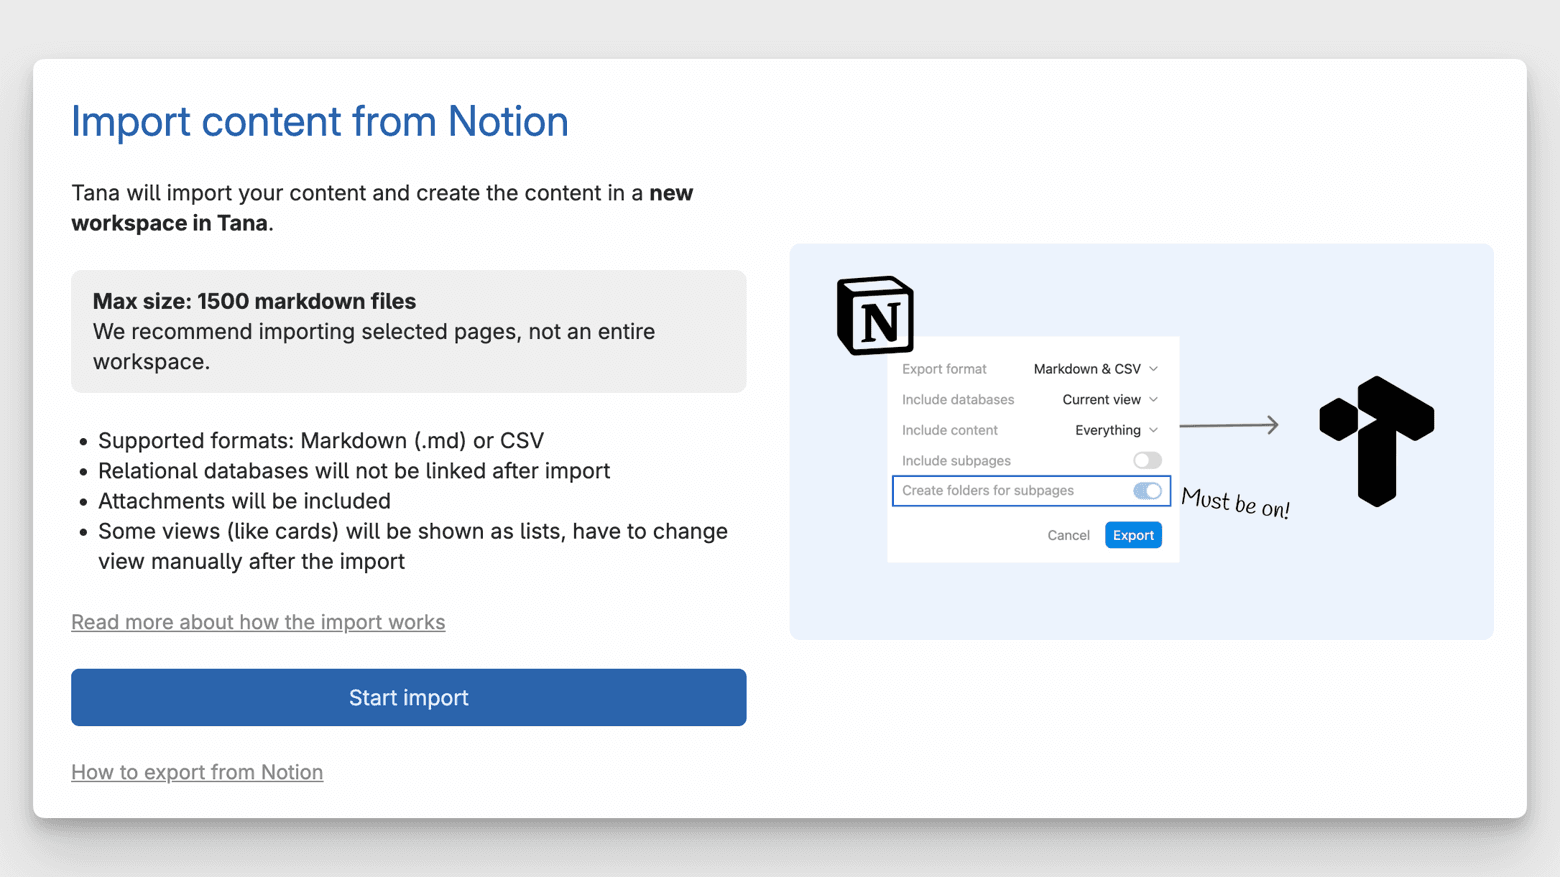
Tana Outliner supports Notion exports in Markdown (.md) or CSV, up to 1500 Markdown files in one import. This gives you room to bring over substantial project documentation, research pages or operational material.
Included in the import:
- Page content and subpages in Markdown
- Linked databases exported as CSV
- Images will be included and shown inline
- Attachments such as PDFs and videos will
- Links between Notion pages, converted to Tana Outliner references
- Links to Notion pages that are not included in the export will retain the Notion URL
Not included:
- Relational links between Notion databases (can be re-created with fields and supertags)
- Custom Notion views such as cards or galleries (these doesn't exist in Tana Outliner)
- Workspace-wide structures or automations
We recommend to import some sections or databases at a time, instead of your entire workspace. This keeps the migration clean and easier to reorganize.
There are a variety of formats that may be included in a Notion export and the importer will not support all of them. If your import gets stuck for several minutes, your export file is either too large or contains data structures that cause the import to time out. Do not retry the import with the same file. Try exporting a smaller sample of content. If you experience this and are willing to share your export file with us, this will help us add support for all corner cases. Submit a bug report in app or to hey@tana.inc.
How to export correctly from notion
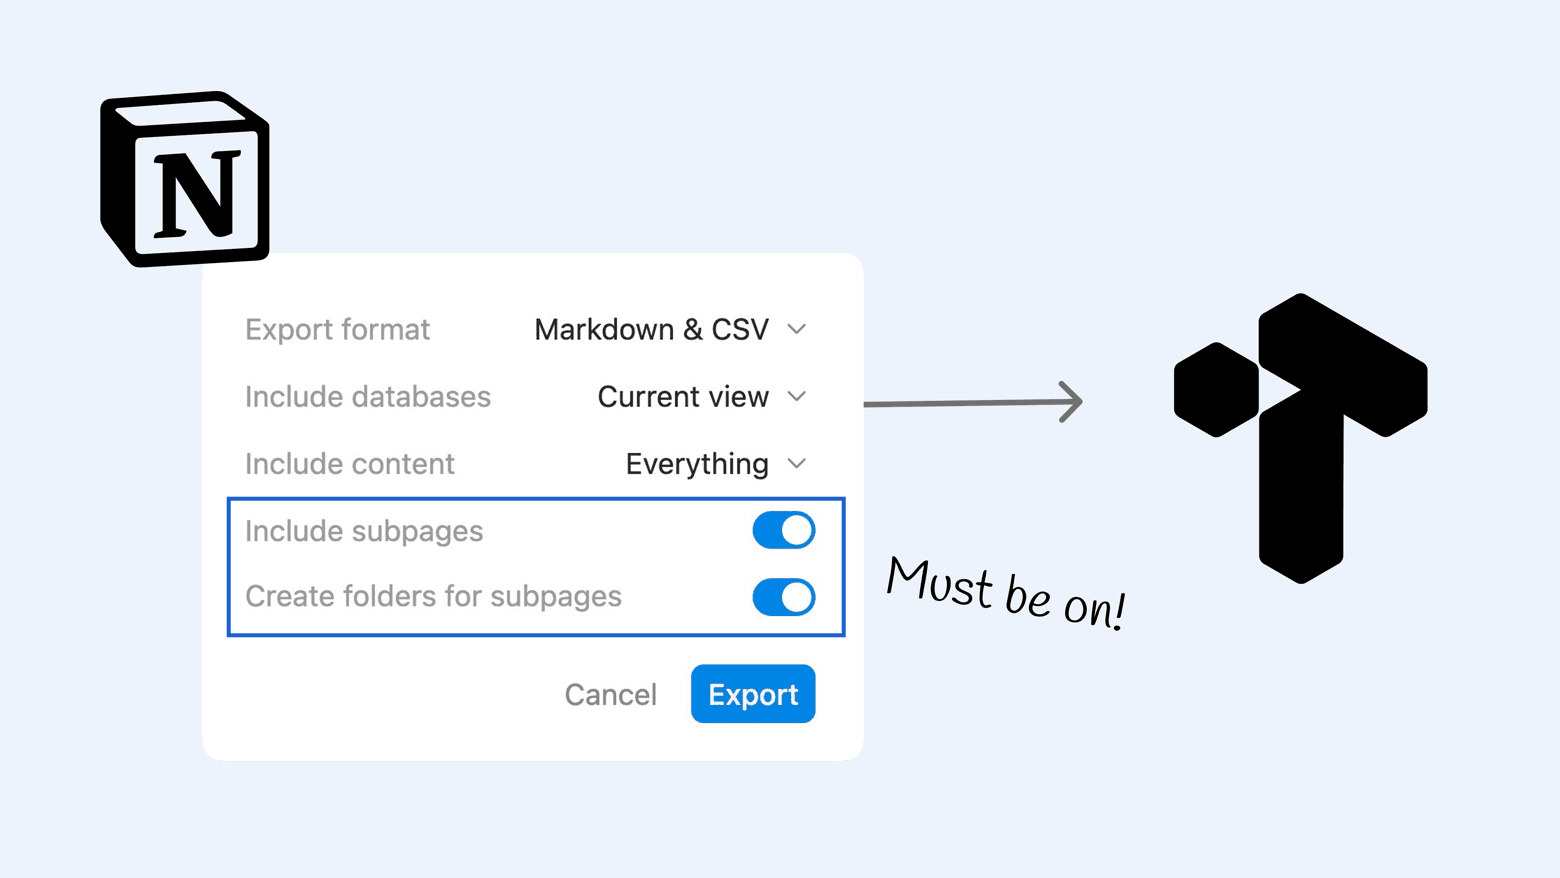
To ensure your hierarchy and file structure carry over, it's important to export pages with subpages included.
- Open the Notion page you want to export.
- Click the options menu in the top right corner.
- Select Export
- Choose Markdown and CSV
- Toggle on Include subpages and Create folders for sub-pages
- Download the zipped file.
These two toggles must be enabled for Tana Outliner to understand the structure of your content and link the content (unless you are importing a single page):
How to import your Notion export into tana

- Go to the user menu in the top right corner of Tana Outliner.
- Select Import content and choose Notion import.
- Review the import limitations shown in the dialog.
- Upload your zipped Notion export.
- Keep your computer awake until processing is complete.
Content will be imported in a new workspace
The imported content appears in a new workspace. This ensures nothing overwrites your existing setup and gives you a safe space to clean things up before merging them into your main or shared workspace.
If you want to move imported materials into a different workspace, use Move with finder to select the exact destination (see below).
What to expect after importing
Notion and Tana Outliner have different mental/data models, so a few adjustments typically follow your first import:
- Views such as cards, galleries or timelines will appear as outline lists. You can switch to tables, boards or other Tana Outliner views manually.
- Database relations will not be automatically reconstructed. You can apply supertags and fields in a table to rebuild the meaningful relationships you want, in a more flexible way.
- E.g. if you have a table with assigned people, tag the people nodes with the supertag you use for people, such as #person
- If you had a task board, add the entries with #task to bring them into
For many users, this cleanup is the moment they reshape their information in a way that matches how they actually work, not how they had to structure things before.
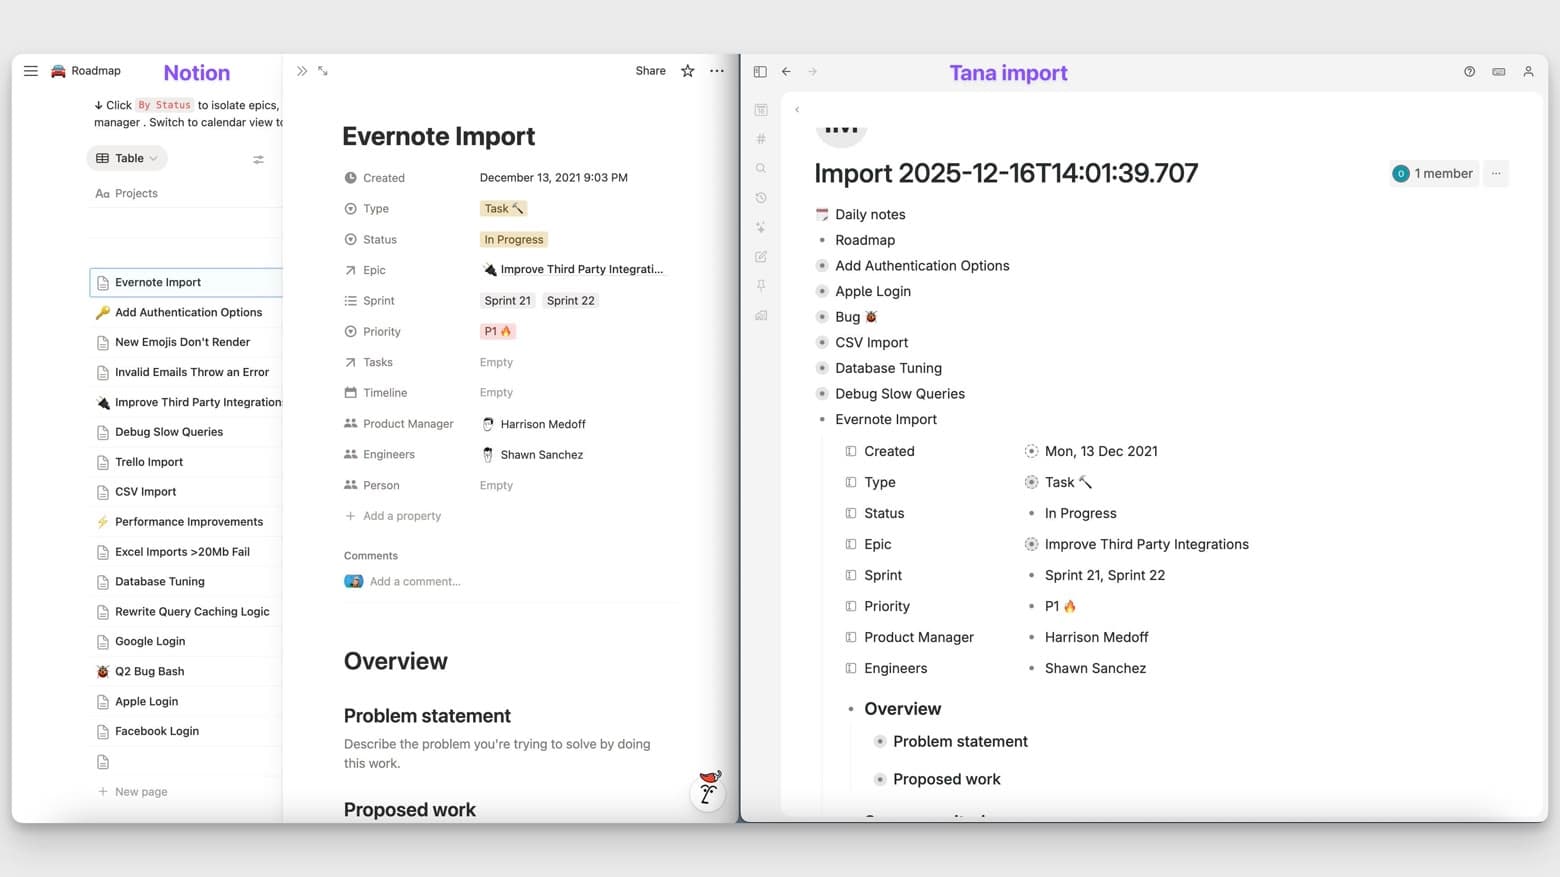
Example of how database content from Notion can look after the import in Tana Outliner:
To re-create database content as a table:
- Move all the nodes under ONE node
- Set this node to Table view (Ctrl/Cmd+K > View as table)
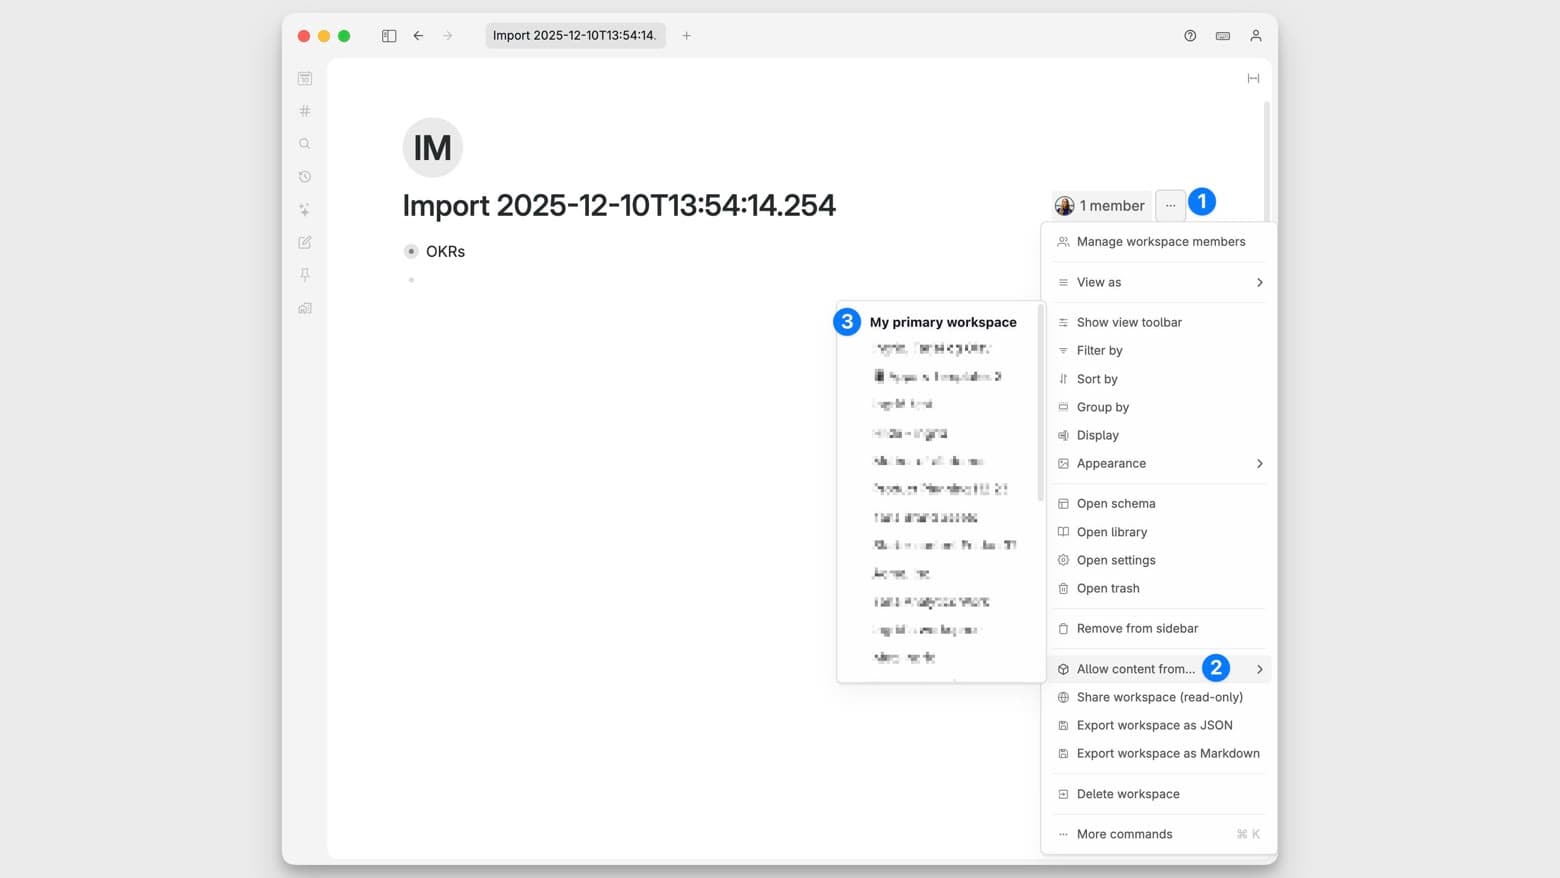
Allow content from your main workspaces to convert the content
If you want to process and convert the content to your Tana Outliner structure before moving it into your workspace, the app allows you to use supertags from other workspaces, by setting Allow content from on the new workspace.
Click the new import workspace in the sidebar:
- Open the options menu
- Go to Allow content from
- Select the workspace you want to allow content from.
If you want to keep your imported content in a separate workspace, Tana Outliner allows you to still work with it in your other workspaces through references and search. You then need to set Allow content from the other way:
- Go into the home node of your primary/personal workspace
- Open the options menu
- Go to Allow content from
- Select the workspace you want to allow content from
You can now use info from your imported Notion content, by doing @ mentions to pull in content!
Moving your content
If you are happy with the imported content and want to move all or parts of it over to your main or a shared workspace, you can use the move menu. Either zoom into the node you want to move (all the content below it will be included), open the node options menu, then select move.
You can also use Ctrl/Cmd+K > Move with finder to open the same move menu, or use the pre-defined move targets with the Move to command.

Tips for a smooth transition
Start with the essentials Bring over the content you rely on daily: meeting notes, project documentation, key databases or client materials. This reduces noise and speeds up onboarding.
Re-use your existing supertags Supertags are the foundation of how structure emerges in Tana Outliner. Tag your meetings, projects, tasks or contacts and watch your graph become more useful instantly.
Use the outline to find gaps Once your content is in Tana Outliner, it is easier to spot duplicates, missing links or areas that deserve clearer structure. This helps you replace scattered documentation with connected knowledge.
Take advantage of AI With your content in Tana Outliner, AI can help summarize notes, extract tasks, create documentation and compare information across pages.