

Overview
Tana Outliner templates are designed for sharing Tana content at scale, one to many. Examples include useful snippets, processes, and setups in Tana. They can range from sharing a single node of information to a full system of supertags, live searches, and commands. For more on templates, see Tana Outliner templates.
In this guide we'll walk you through how to share your first Tana Outliner template.
Sharing Tana Outliner templates is only available for Tana Pro subscribers.
When should you share a template?
Templates are great for sharing pre-designed structures, information, or processes that you have built in Tana to help others save time. A good question to ask is: "Can I easily explain this process to someone else?"
If the answer is yes, you have the beginnings of something shareable.
What types of templates can you build and share?
There are lots of things you can share as a Tana Outliner template, but the three most common kinds are:
Quick snippets
A quick snippet template is static rather than process-driven. These templates deliver information rather than processes, and they are great for sharing useful nodes with others.
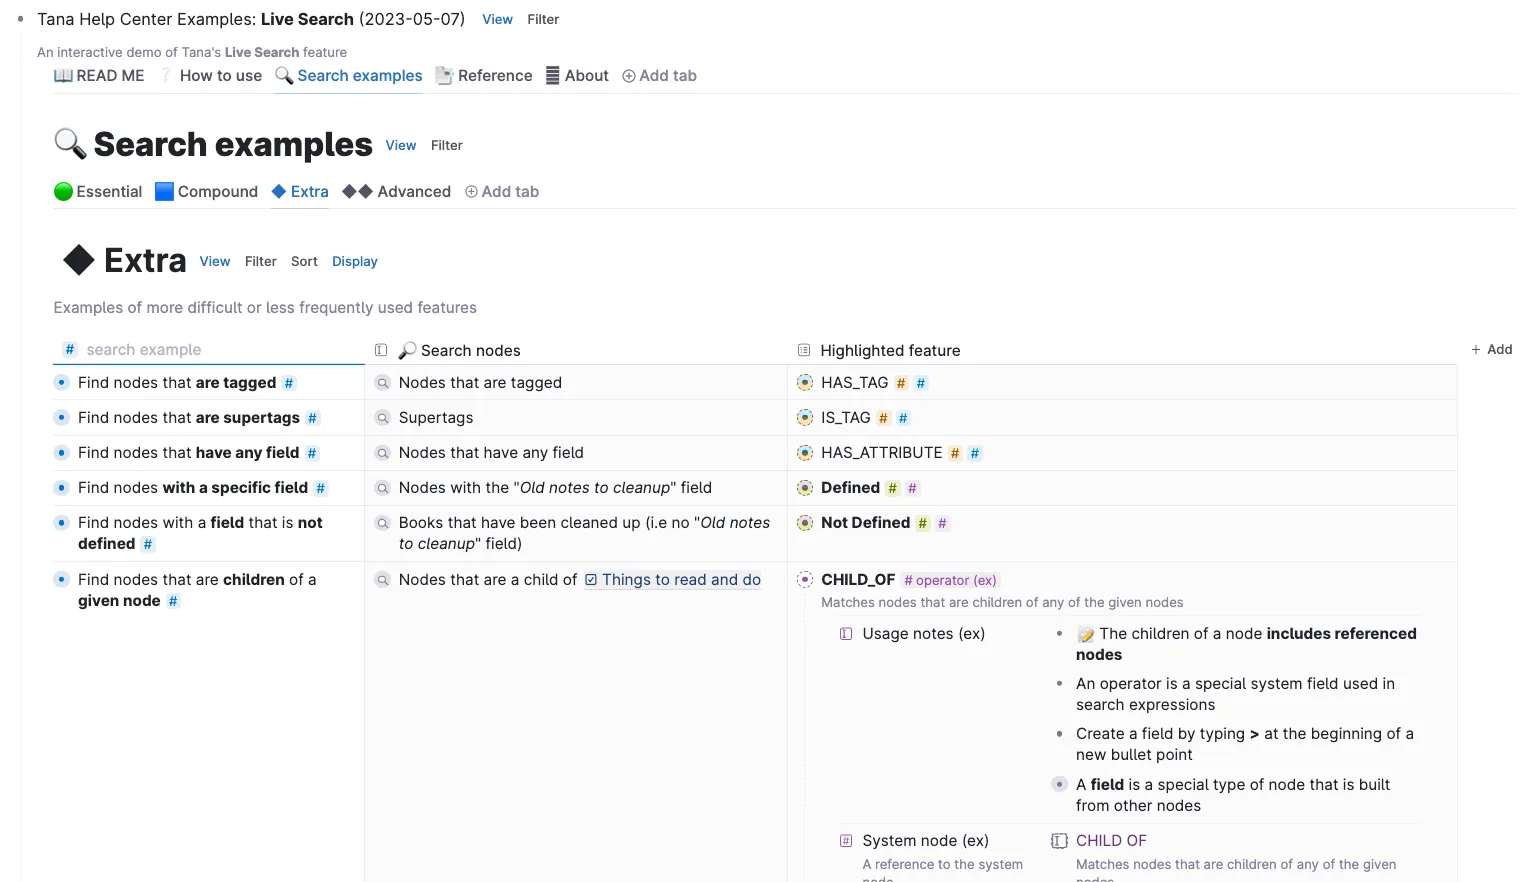
Examples might include a guide or informational database like the Navigators Help Centre, which includes a list of useful searches. The template is designed to deliver information rather than be installed as a process in your workspace.
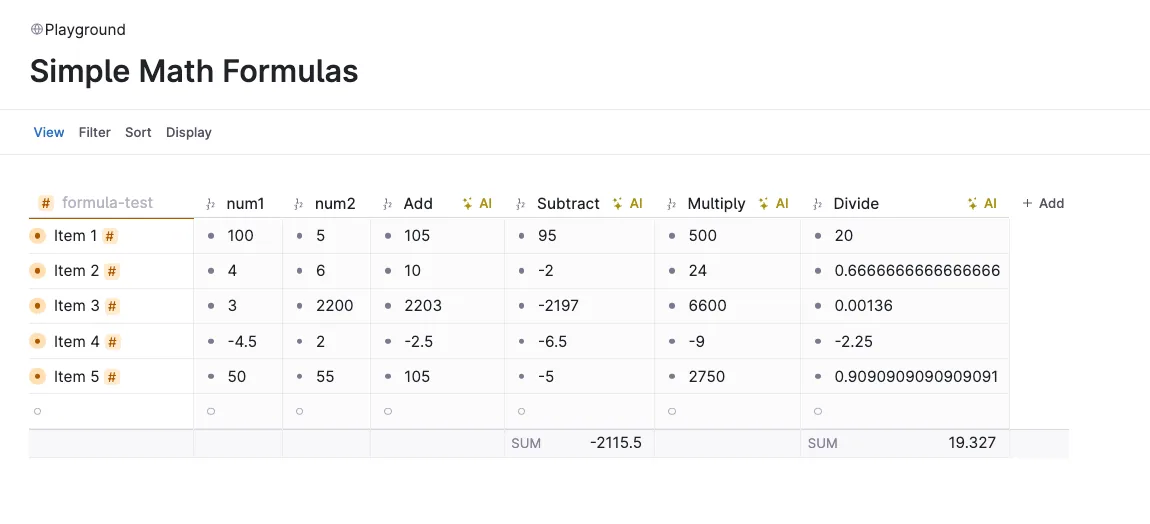
Another example is Sarah Bentley's math formulas, where she shares a set of AI commands to show you how to do math with Tana AI.
Base or starter templates
Base templates are process-driven. They are designed to give people a starter process made of a set of supertags, field configurations, and commands.
Typically they deliver a single process, for example a project management template, a CRM template, or a marketing calendar template.
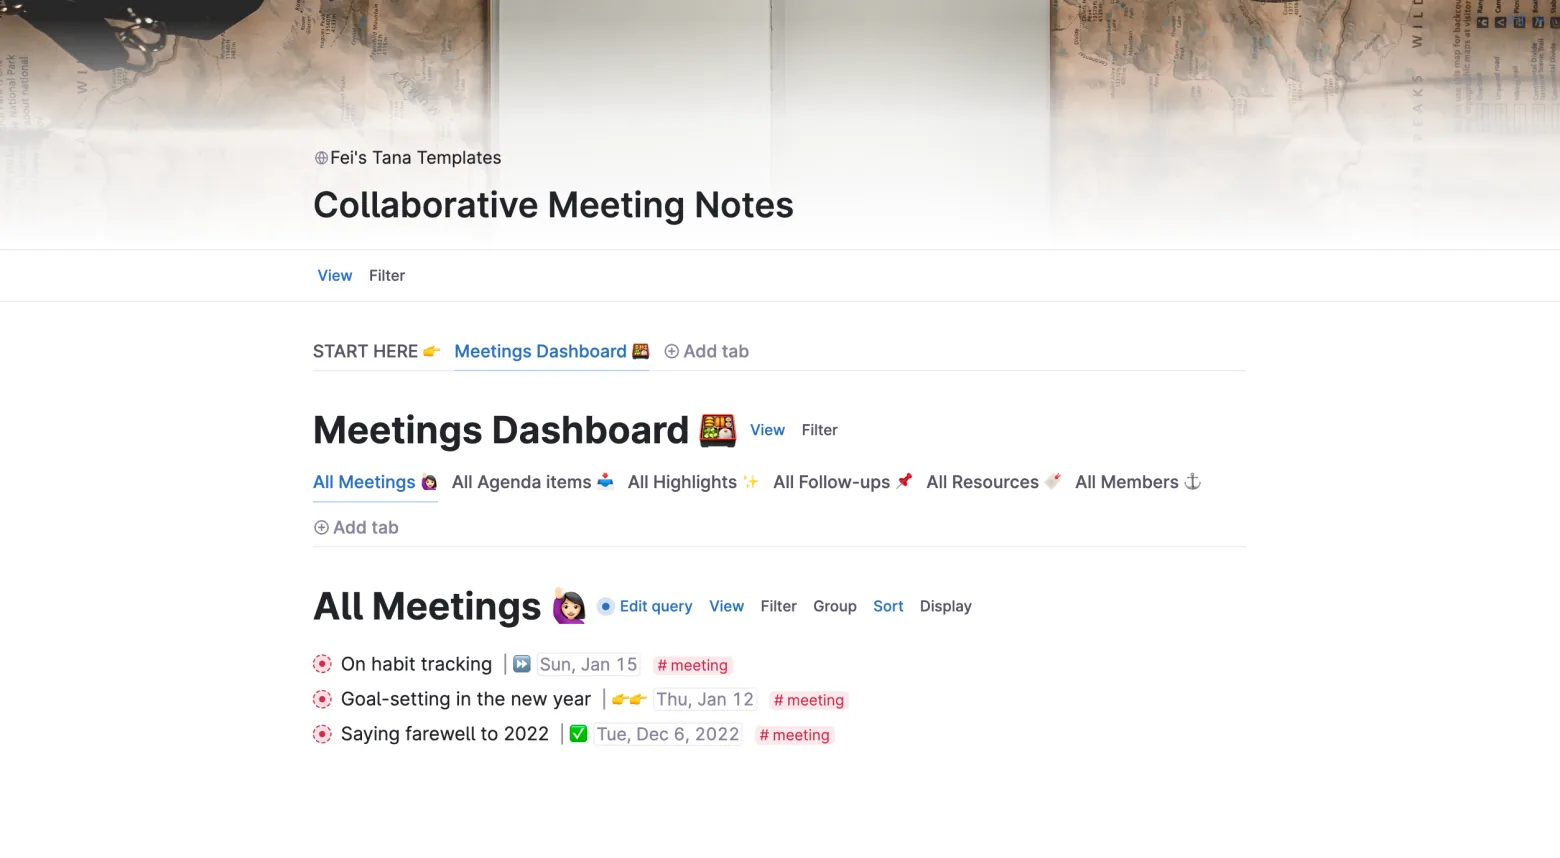
Think of these templates as a starter kit that lets others get your process into their workspace without doing the technical setup themselves. Example: a collaborative meetings template.
Complete systems
Complete systems build on the base template idea but are usually bundled together and contain an element of your IP and expertise. They combine multiple processes in a certain area to achieve an outcome.
For instance, Tanarian Brain from CortexFutura is a complete system for organizing everything in your Tana workspace.
You should only consider building a complete system once you are confident sharing snippets and base templates.

🍱 Section 1: Map out your template
Before you start building, it helps to take a step back and create a quick plan. Spending five minutes here actually speeds up how quickly you can make a template.
We've created a quick template mapping canvas that you can use to plan your template:
The template mapping canvas
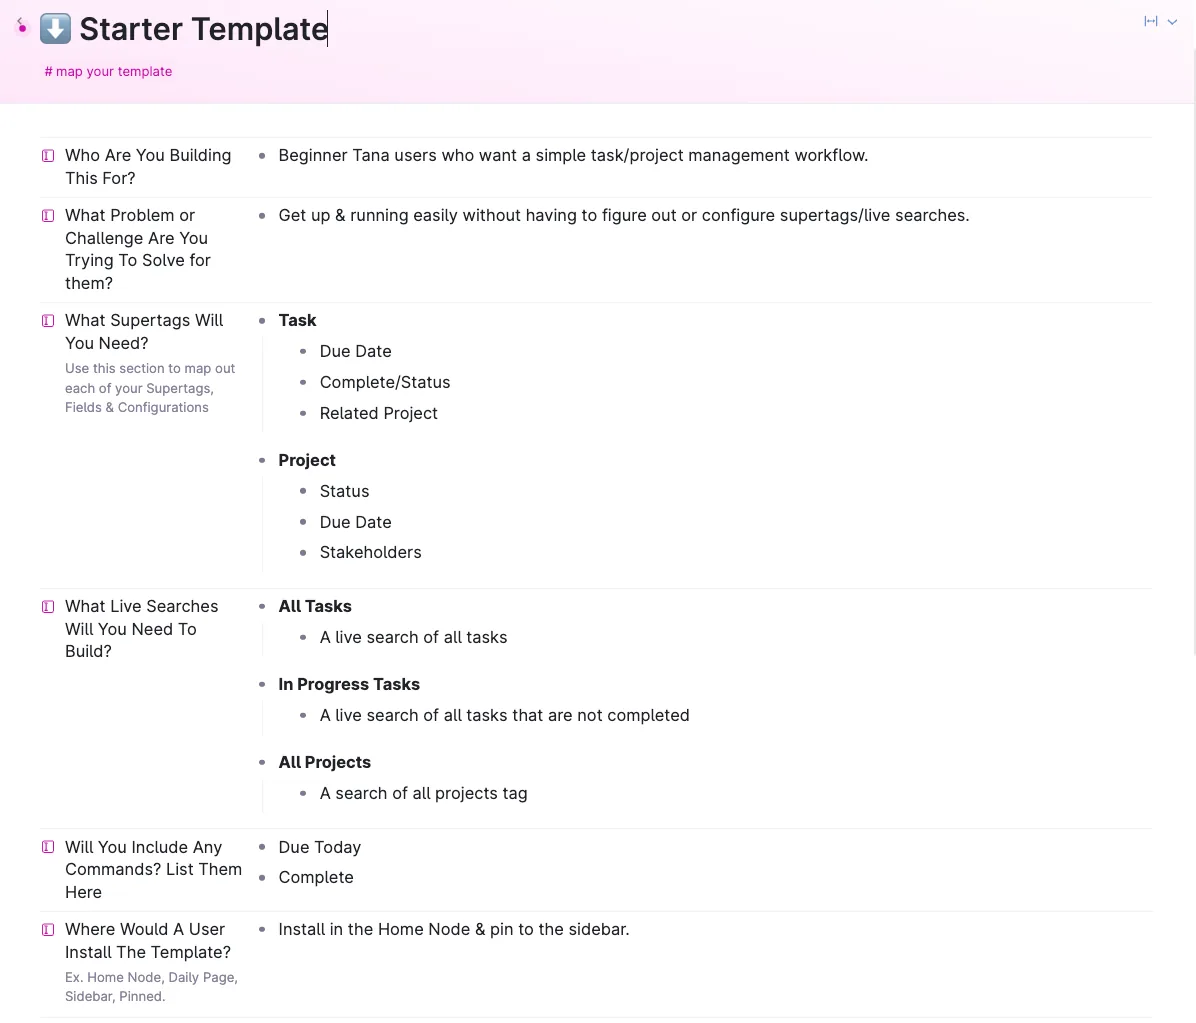
To get started, 👉 click here to install the template mapping canvas (opens a new tab with Tana).
Then answer each of the questions in the canvas:
- Who are you building this for?
- What problem or challenge are you trying to solve for them?
- What supertags will you need?
- What live searches will you need to build?
- Will you include any commands?
- Where would a user install the template?
🛠️ Section 2: Build your template
Now that you're clear on what you're building, let's get into actually building your template in Tana.
Where should you build your template?
We recommend creating two additional workspaces if you are going to create and distribute templates:
- Publish workspace. This is where you build the template. Make sure content from this workspace is not shared into any of your other workspaces, otherwise you might accidentally change your template.
- Test workspace. A separate workspace where you can test installation and usage before you distribute your template.
Templates should be built for the express purpose of sharing with others, so we encourage you to build a template from scratch rather than sharing something existing from your own workspace.
See Creating a new workspace for more on additional workspaces.
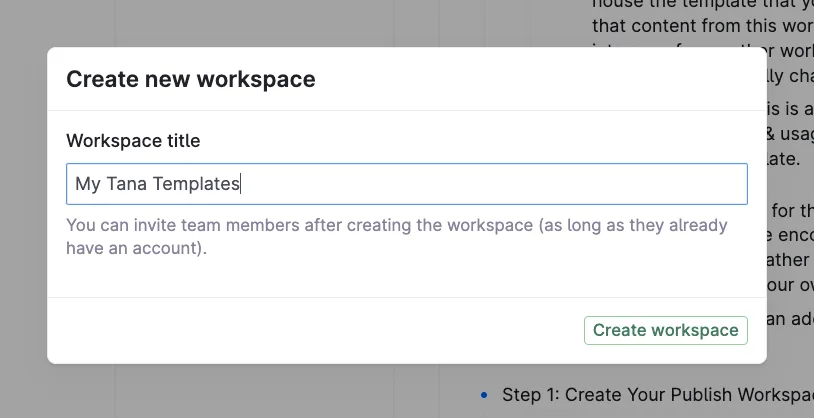
Step 1: Create your publish workspace
Create a new workspace in your Tana account and call it "My Tana templates".
Publish the workspace by going to the top-level node, clicking the three-dot menu, and selecting Publish workspace (read-only).
You only need to create and publish a new workspace one time, for your first template. Once you have your publish workspace, you can publish any number of templates from it.
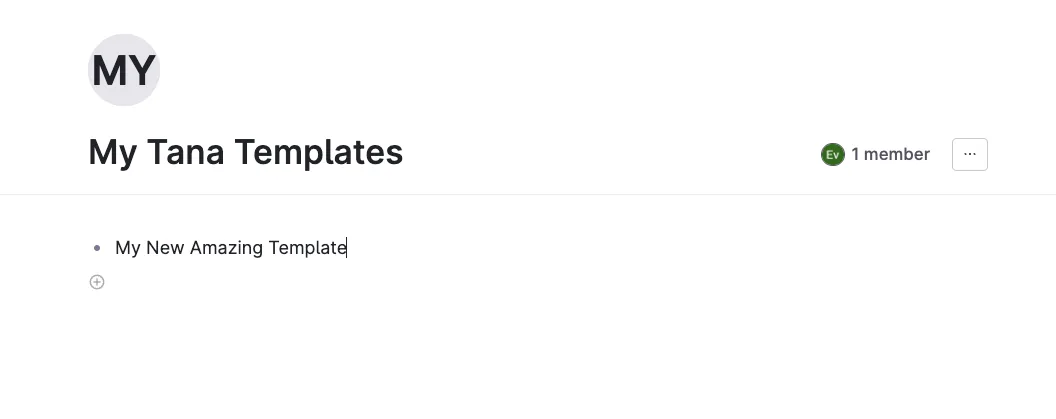
Step 2: Create a template node
Create a new node in your template workspace and give it a name (the name of your template is always a good idea).
This node will house all the template components and is exactly what people receive when they install your template.
Everything that makes your template run should live in this node, including the supertags, live searches, and commands you listed in your template map.
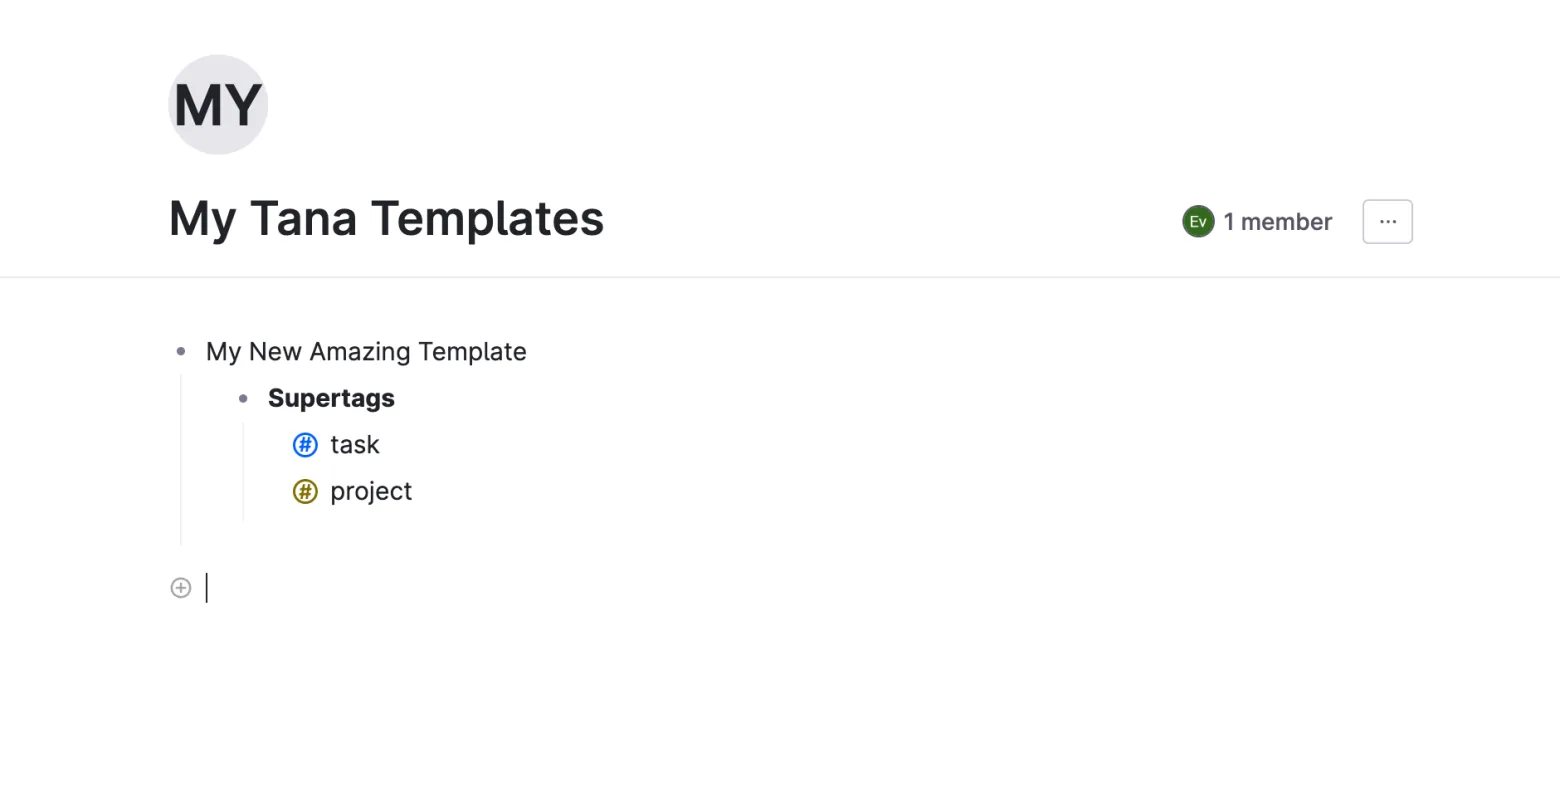
Step 3a: Build your supertags
Create a nested node under your main template node and call it Supertags.
Create each of the supertags you listed in the template map.
Move the supertags into the template by @-referencing them in the node, then pressing Cmd K (macOS) or Ctrl K (Windows/Linux) on the node and selecting Bring referenced node here.
The node should have a solid line rather than a dotted line when done right.
Step 3b: Configure your supertags
Configure each of your supertags with fields and options in the supertag configuration window.
For more on the configuration panel, see Supertags.
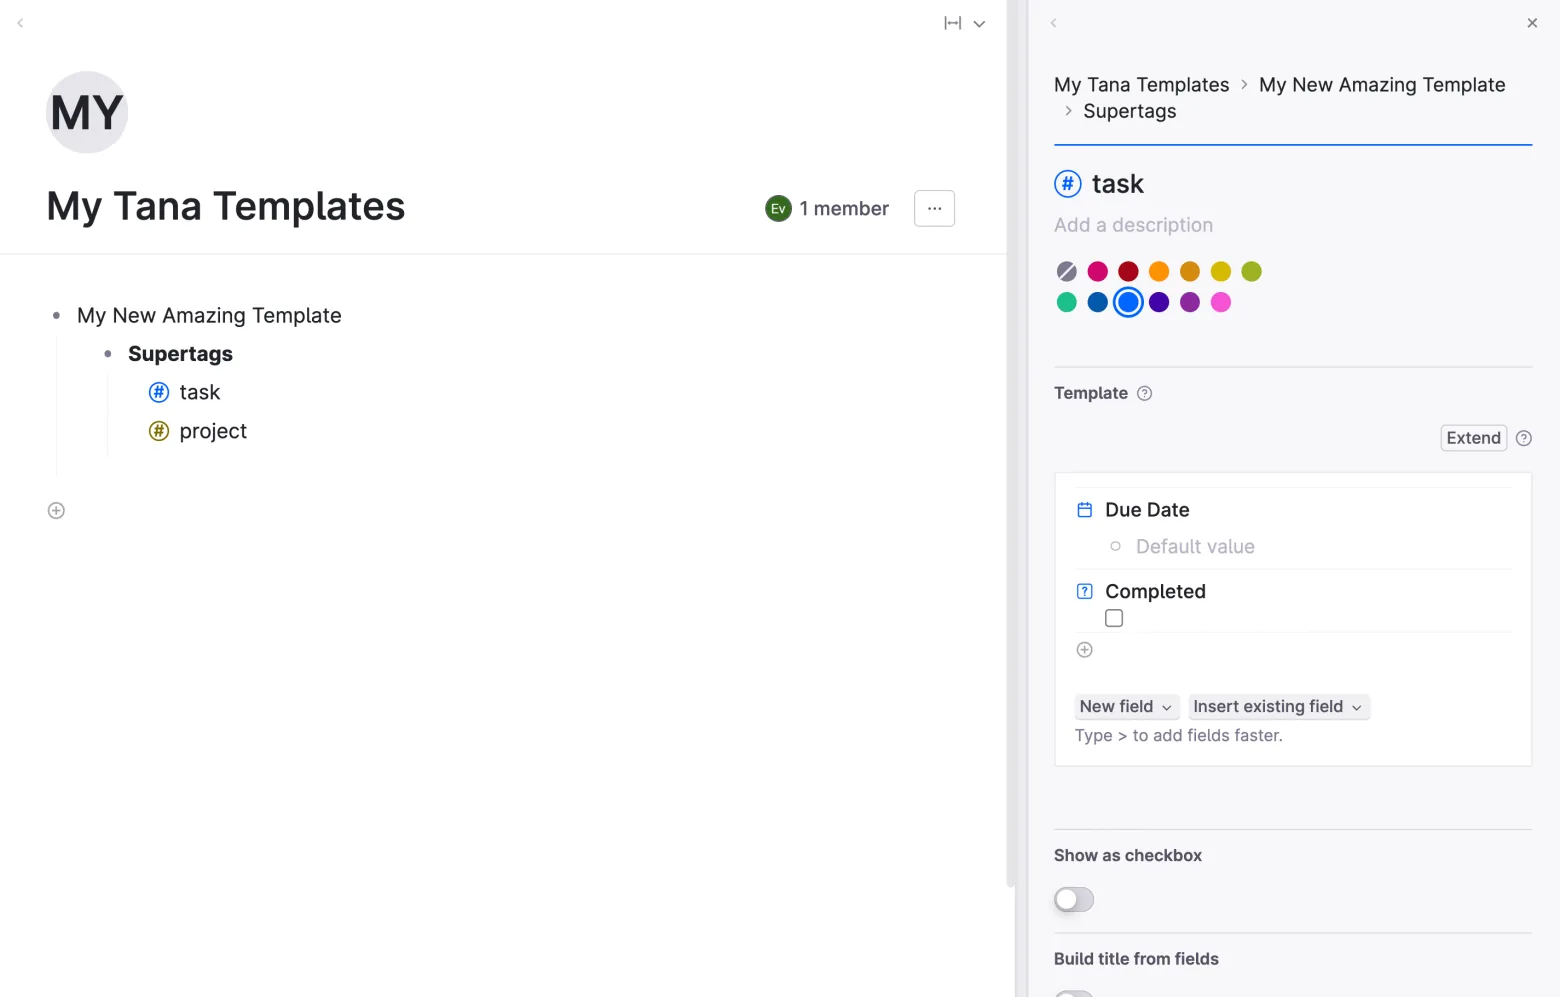
When creating fields in your supertags, opt for new fields instead of reusing fields from other supertags in your workspace. This avoids reference warnings later when sharing your template.
Step 3c: Build your search nodes
If your template doesn't include any search nodes, skip to the next section.
Create a new node in your template called Live searches.
Build out any searches that make it easier for users to find all items for each supertag.
For more on search nodes, see Search nodes.
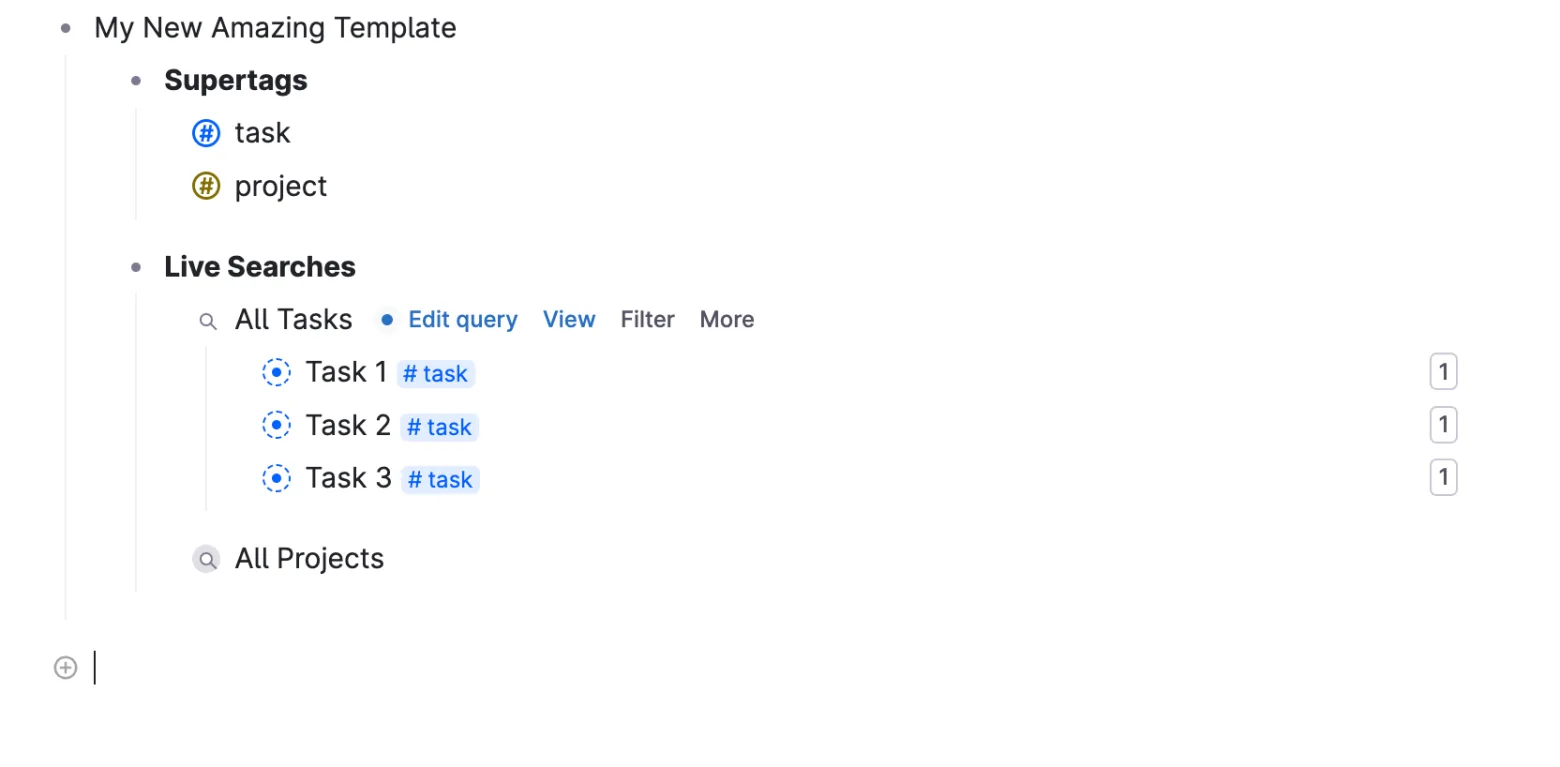
People install templates because they want an easy way to get started with Tana, so pre-building the live searches they'll need is an easy win for them and for you.
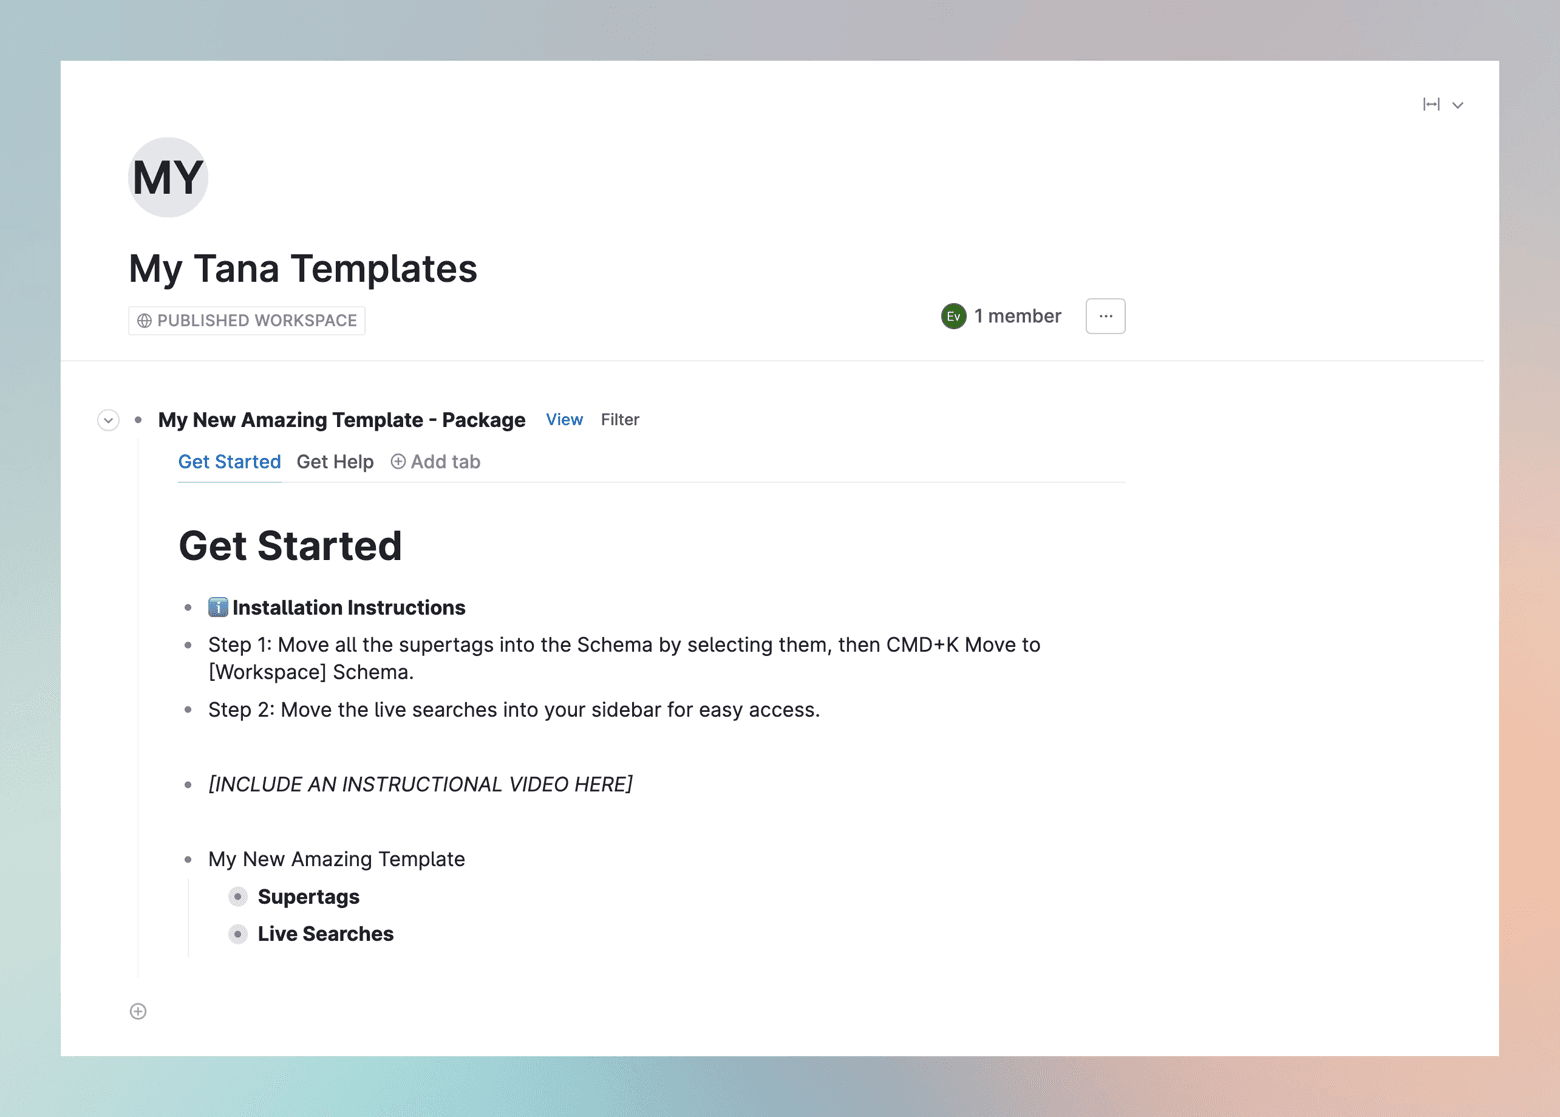
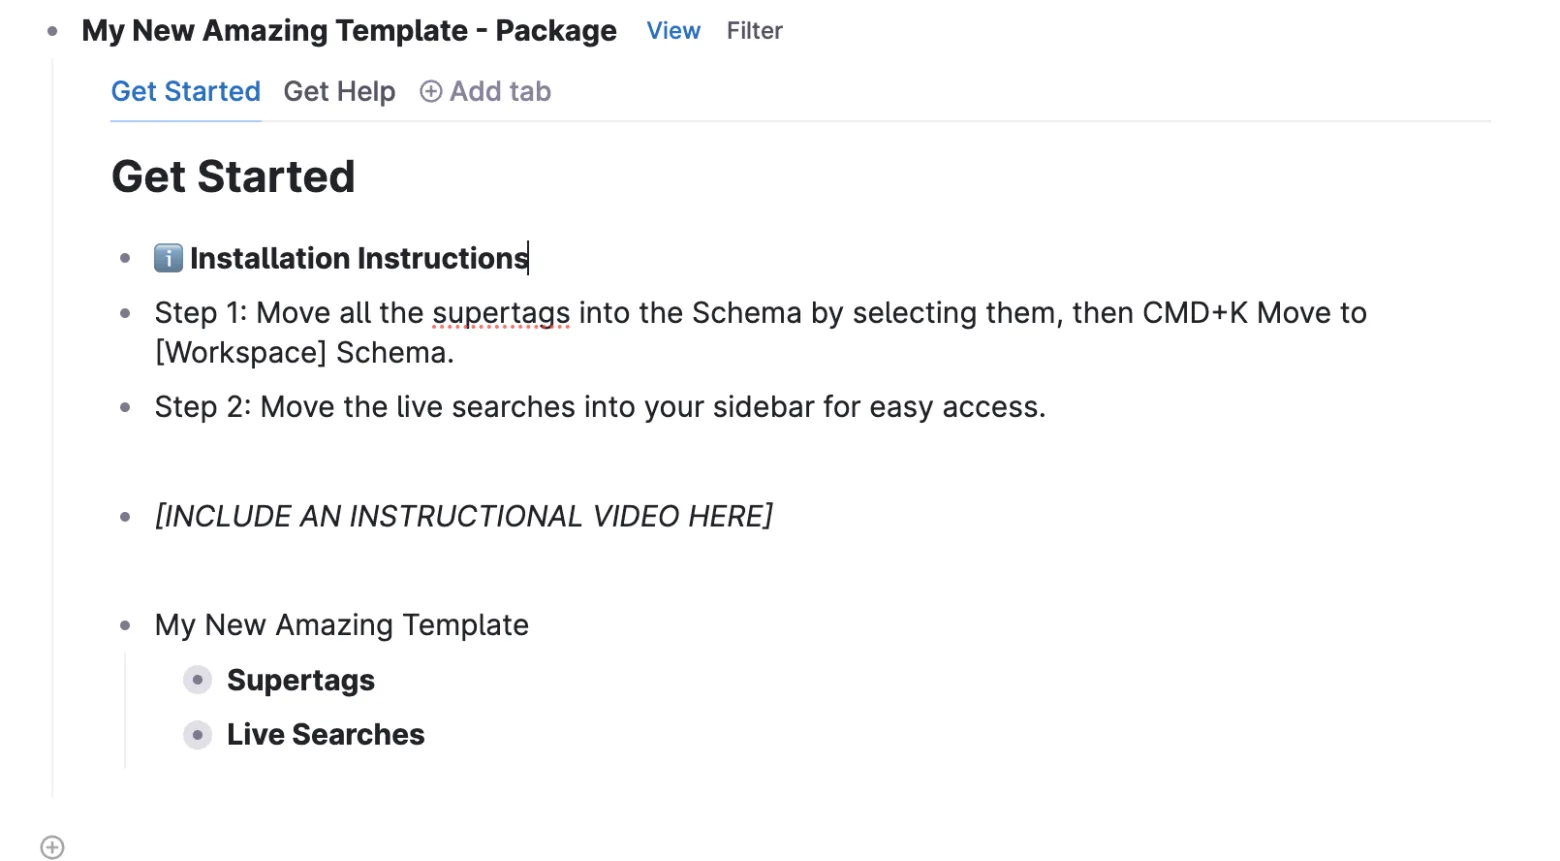
Step 4: Create your template package to publish
Packaging up your template makes it easier for people to install and start using it fast.
- Create a new node and call it "[Your template name] package".
- Press
Cmd K(macOS) orCtrl K(Windows/Linux) and select View as tab. - Create three tabs: Get started, Building blocks, and Get help.
- Move your template node into the Get started tab.
- Add instructions for installing the template.
- For simple templates, try to include an example node with a supertag applied so users can see how it will look.
- Add additional instructions for how to use the template, or for connecting it with base types or existing tags through extension.
A video is a quick way to show people both how to install and how to use your template.
- In the Building blocks tab, place or reference all the supertags, fields, and commands so it's easy to get an overview of what's included.
- In the Get help tab, include instructions for getting in contact with you.
You can add as many additional tabs as you like to help your users understand and use the template. Some ideas:
- A quickstart guide that can be used as a handy reference.
- Under the hood for more advanced users to understand how the template works.
- Settings and customization options for people who want to customize your template.
- Sample data to help people visualize what they can use the template for.
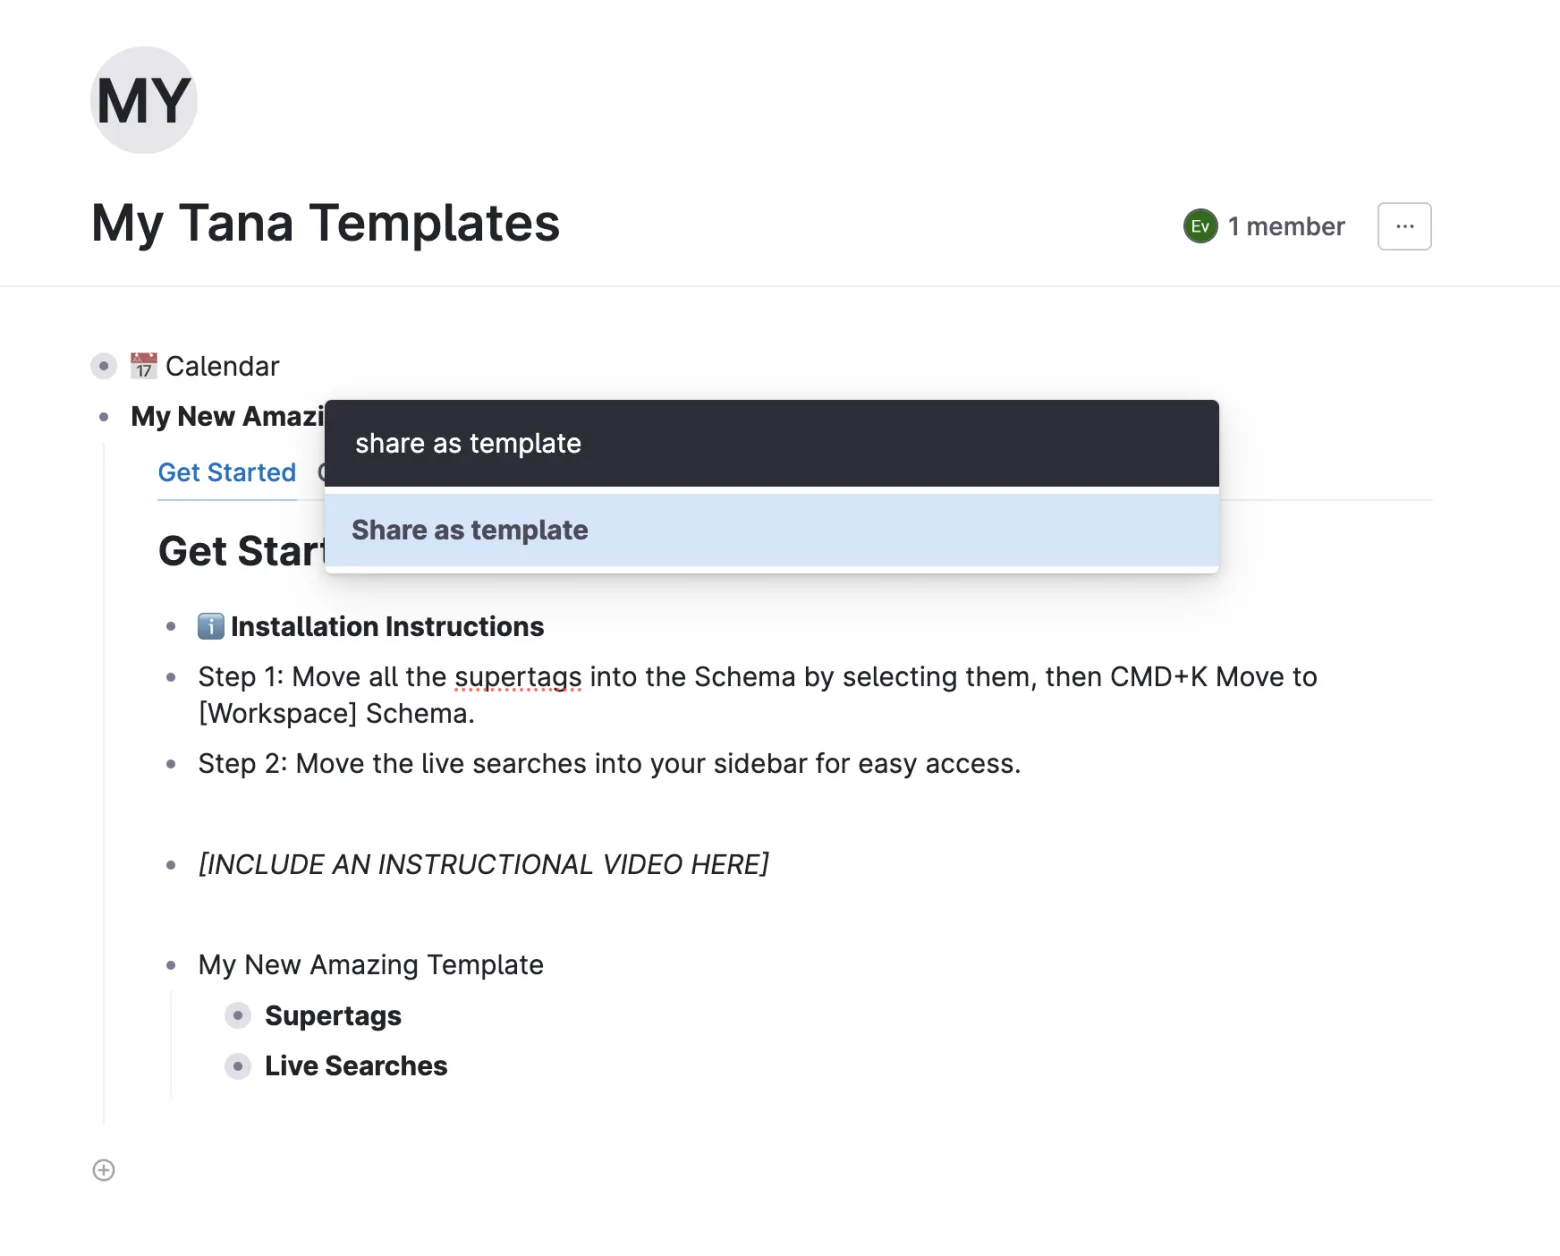
Step 5: Create a template link
Once you have finished creating and packaging your template, you'll want to create a template link so you can share it.
If you didn't publish your workspace in Step 1, go back and do that now.
Once your workspace is published, go to your template package node and press Cmd K (macOS) or Ctrl K (Windows/Linux), then select Publish as template.
Copy the URL and store it somewhere safe. This is the URL you give to people so they can install your template.
Step 6: Troubleshoot your template
If your template preview contains errors, you'll need to fix those before distributing your template.
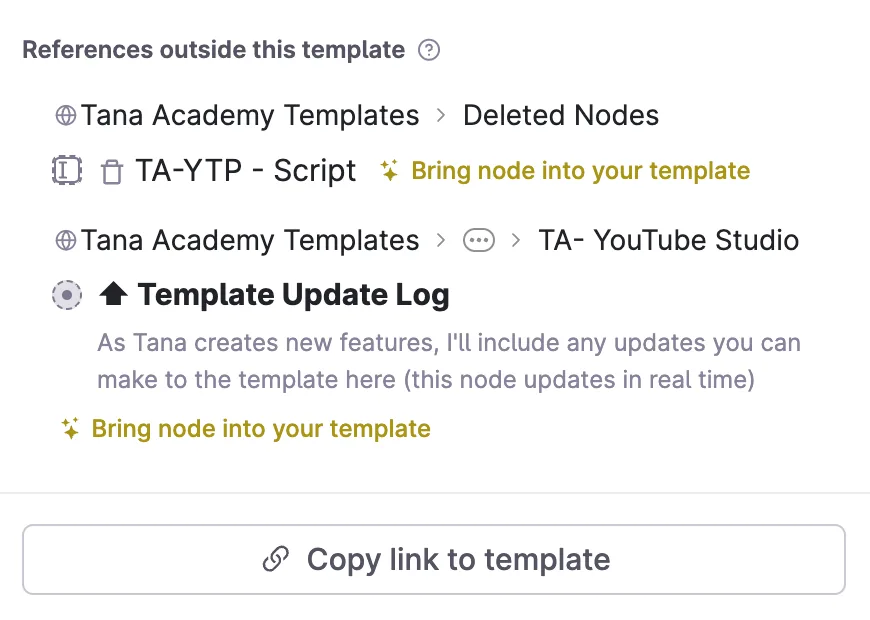
The most common error is references outside this template. This means you have referenced a supertag or field that doesn't live in the template itself.
You can fix these by clicking Bring node into your template.
Step 7: Test your template
It's important to test your template before you start distributing it.
First, test installing the template yourself to make sure everything works as intended.
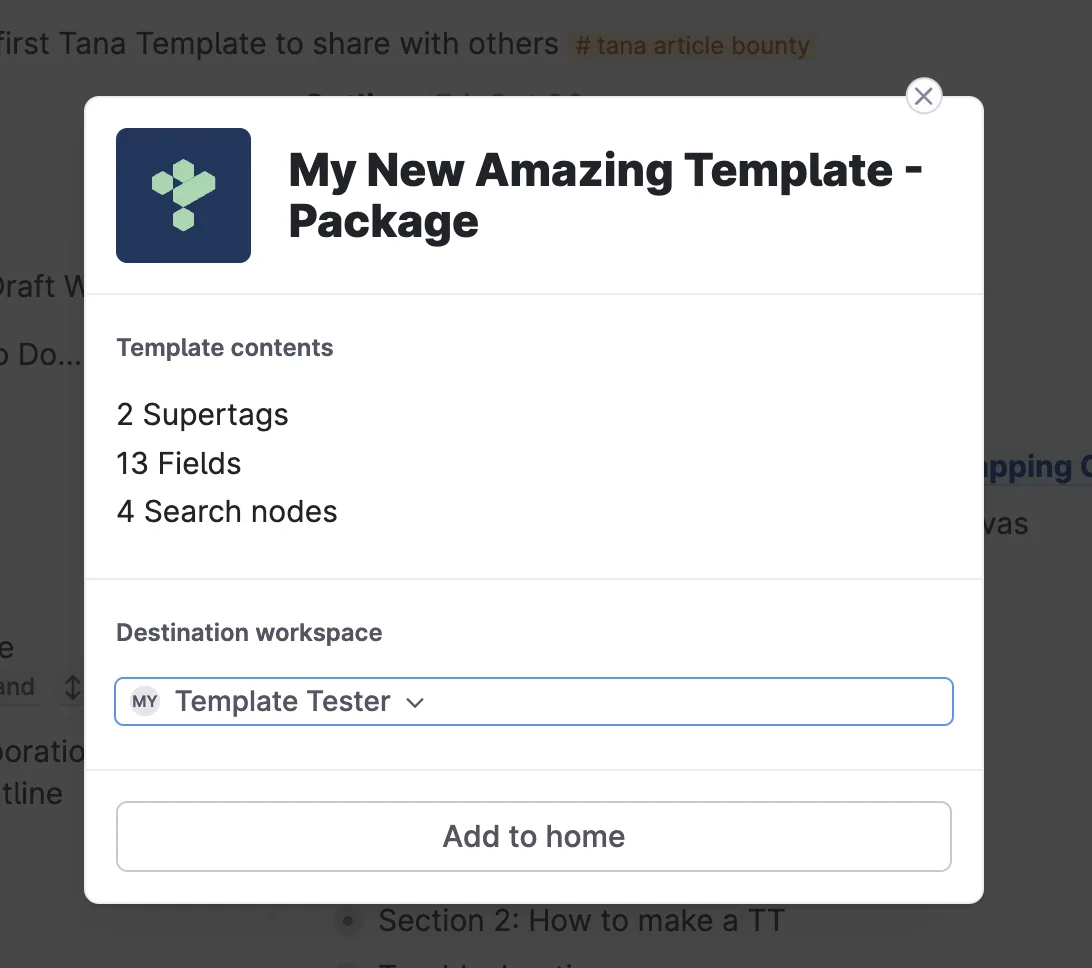
Create a new workspace called Template tester, then paste your shareable template link into your browser and wait until the template installer screen loads.
Choose your template tester workspace and press Add to home.
Test out all the elements of your template to make sure everything is working as expected.
Once you're confident everything is working, send it to a trusted Tana friend who can test it with a second pair of eyes.
Congratulations 💐
You've just set up your first Tana Outliner template. Now you can use the shareable template link to share it with other Tana users.
For further reading, see the documentation on Tana Outliner templates.